If you are a beginner Ubuntu user, you may find it a bit tricky and confused on how to install the Nvidia drivers. This quick guide explains two methods – graphical and command line to install Nvidia driver in Ubuntu Linux.
Nvidia makes advanced graphics processing units that are used for cutting-edge processing because of their power of computation. Many hardware, servers includes Nvidia GPU units today. They have many types of GPU units and finding a proper driver for your Laptop/Desktop is complicated, especially if you are a beginner. Some drivers are obsolete, not present in the main distribution repo, while others are available.
By default, the open-source Nvidia driver Nouveau is used by Ubuntu and other Linux. However, being an open-source driver – it lacks many features which means you can not fully utilize your GPU’s power. Hence the proprietary drivers are required from Nvidia. Also remember, you may not get a driver for your Nvidia card always, so if that is the case, then you are out of luck!
This guide explains how you can find your graphics card unit details (such as model, etc) and install a proper driver for your card which is compatible with your version of Ubuntu Linux.
A word of caution, before you follow the steps. If you incorrectly install the driver, then you may end up with a broken system. If you do, then check the troubleshooting guide at the end.
Table of Contents
Install Nvidia Driver in Ubuntu Linux
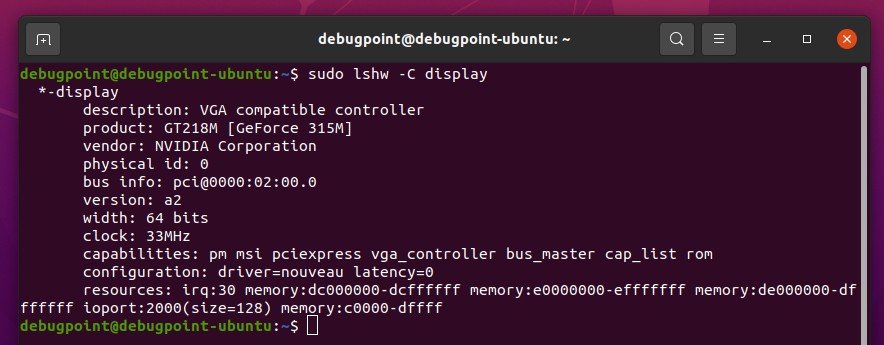
First, find out your GPU unit details via terminal by running the following command. This lshw the utility gives you detailed information about the hardware of your system.
sudo lshw -C display
For this example, you can see the graphics card name is GeForce 315M.
GUI Methodcomplicated
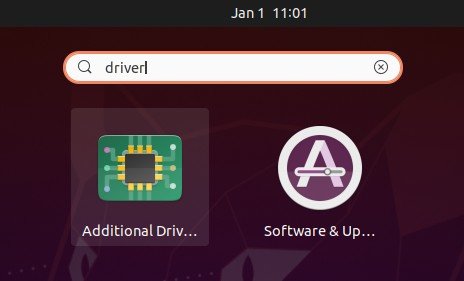
Open the GNOME search and look for Drivers. Open the ‘Additional Drivers’ app.
On the following window, you should see the list of devices that requires proprietary drivers. For this example, you can see the above GeForce 315M driver is present.
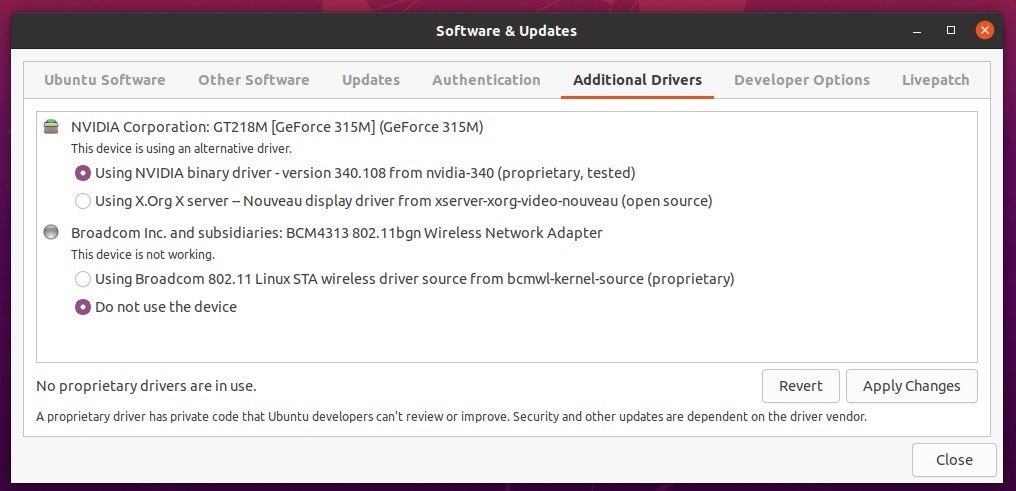
Select the Nvidia driver and click apply changes. Provide the administrator password and complete the installation to finish.
Once the installation is complete, reboot the system.
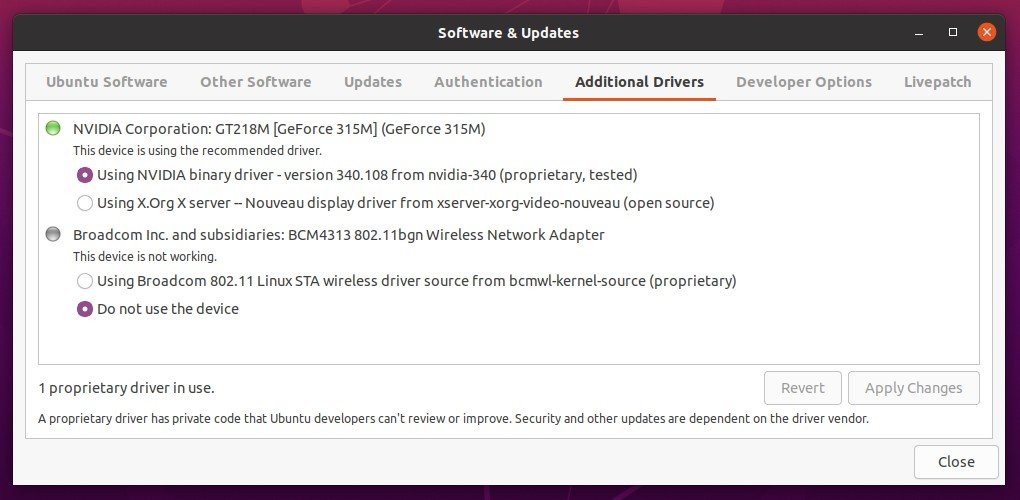
After reboot, open the Additional Driver window again. You can see the Nvidia driver is in use in your system and a green icon beside the driver.
If at a certain point, if you want to switch the driver from Nvidia to Nouveau, simply select the proper one in the above window and click apply changes followed by a reboot.
Once the installation is complete verify the Nvidia drivers using these steps.
CLI Method
You can install the Nvidia drivers using command line (CLI) method as well.
Open a terminal and run the below command in Ubuntu. This will show the package name which you need to install specifically needed for your GPU unit and Ubuntu version.
sudo ubuntu-drivers list

Once you have the package name, you can simply use apt to install it.
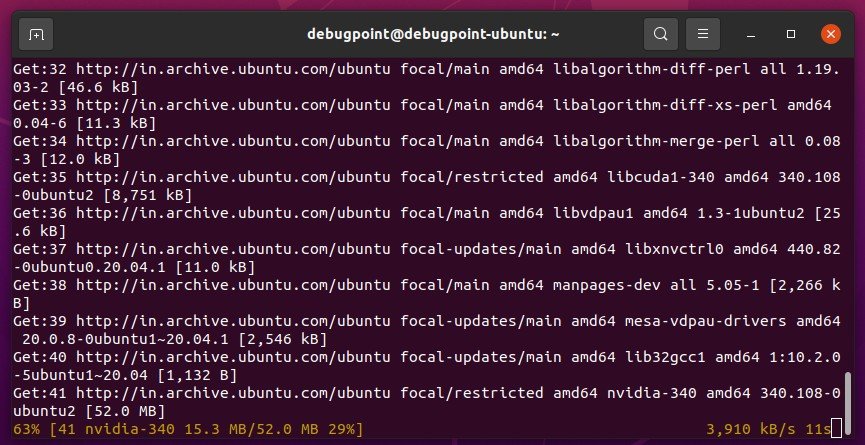
sudo apt install nvidia-340
Alternatively, you can install all needed drivers using one command as below.
sudo ubuntu-drivers install
After installation, you can reboot the system.
Verify
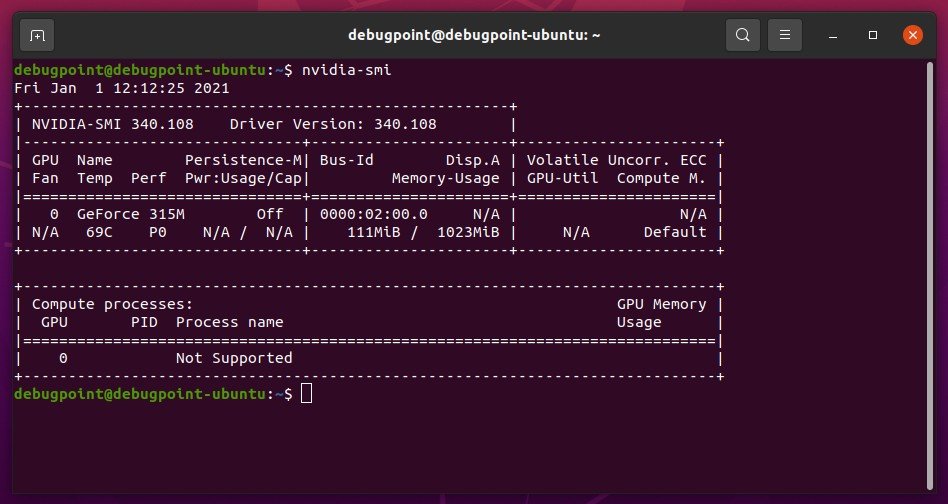
Open the GNOME search and type Nvidia. Open the application Nvidia X Server Settings. Or, open a terminal and type below.
nvidia-smi
If the driver is installed properly, you should see the details.
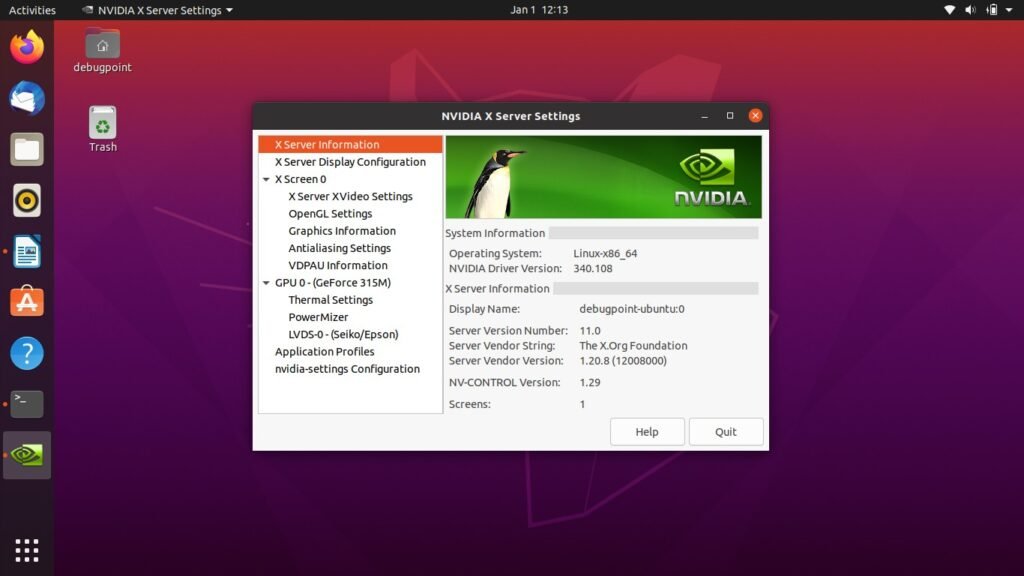
Then you can run below to open the Nvidia X Server Settings window where you can change various settings of your GPU drivers.
nvidia-settings
Troubleshooting
If you end up without a login screen, unstable system after you install the Nvidia driver for some reason, do the following.
Open up a terminal Or, press CTRL+ALT+F1 if you are stuck. This will bring up the command login for your Ubuntu system. Login using your credentials.
Then purge the Nvidia packages using below command.
sudo apt remove -- purge nvidia-*
If you know the exact package name, you can use it. For example:
sudo apt remove – purge nvidia-340
Or, you can run below to uninstall via Nvidia provided uninstaller.
sudo nvidia-uninstall
I hope this guide helped you to install the Nvidia display driver in Ubuntu Linux.


