A quick and easy tutorial on how to create a bootable USB using the Etcher tool in Ubuntu and other Linux.
Etcher is a utility created by Balena, that makes your life easy with its unique take on creating bootable USB and SD cards with a .iso file. This guide will show you the steps to download and install Etcher.
Although it is a bit trivial, it may be difficult for others. Hence this guide.
Primarily Etcher is used for flashing or writing the Linux OS .iso images, for example, Ubuntu, Linux Mint .iso images, etc. But ideally, it should work for any other .iso files as well.
Other utilities are available to create bootable USB disks in particular, like earlier I wrote about a guide using Unetbootin.
But that said, Etcher is, in my opinion, faster, cleaner, and better. It seldom fails. The success rate is high.
Before I explain the steps, here is a quick recap of its features.
Table of Contents
Etcher Features
- Crisp 3-step process to create a bootable USB drive
- Autodetect the USB
- Select the file, Select target, and write fast
- Clone a drive
- Choose the downloaded .iso file Or directly from the URL
- Clean and eye-friendly UI
- Cross-platform – Linux, Windows, and macOS
- Built-in JS, electron
- Standalone AppImage executable available for Linux
Installing Etcher
Etcher is available for all platforms. So you can easily install it using the following methods in all Linux distributions, macOS, and Windows.
Firstly, go to the below link and click on the “Assets” at the top of the page.
For All Linux distributions
Download the AppImage executable from the above link. Then change the permission to the executable from ‘right click -> properties’. Then run the file.
For distribution-specific packages, refer below.
Debian, Ubuntu
To install Etecher in Debian, Ubuntu, Linux Mint, and related distributions, follow the below commands from the terminal.
echo "deb https://deb.etcher.io stable etcher" | sudo tee /etc/apt/sources.list.d/balena-etcher.list
sudo apt-key adv --keyserver hkps://keyserver.ubuntu.com:443 --recv-keys 379CE192D401AB61
sudo apt-get update
sudo apt-get install balena-etcher-electron
Fedora
For Fedora, follow the below commands from the terminal.
sudo wget https://balena.io/etcher/static/etcher-rpm.repo -O /etc/yum.repos.d/etcher-rpm.repo
sudo dnf install -y balena-etcher-electron
Arch Linux
For Arch Linux, make sure yay is installed. Then you can run the below command to install.
yay -S balena-etcher
Create a bootable USB Using Etcher
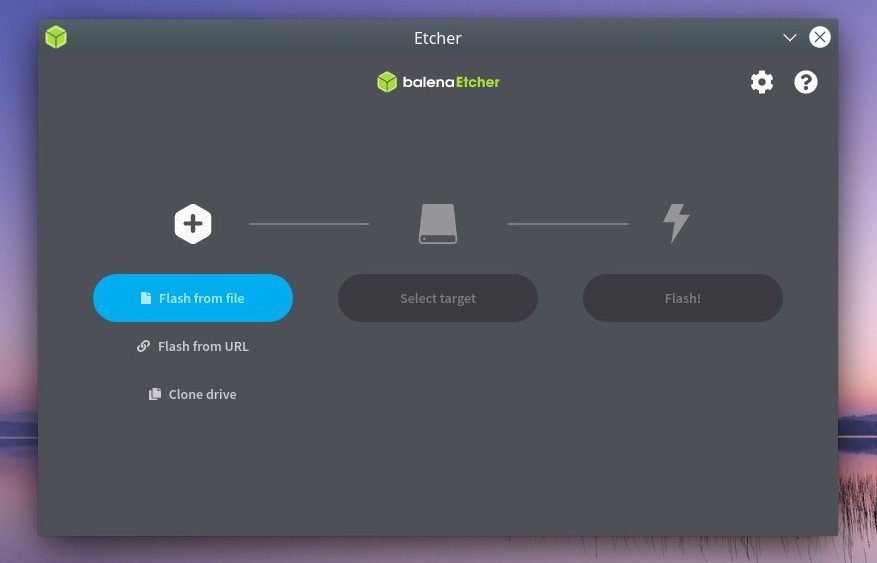
Once you have installed it successfully, launch the application. The first window shows three steps which you need to follow. Of course, you need a USB stick and the .iso file to write.
Step 1: Select the file
Plugin your target USB or SD card. Browse and select the location of your .iso file. Or, you can pull it directly from the internet via the URL option.
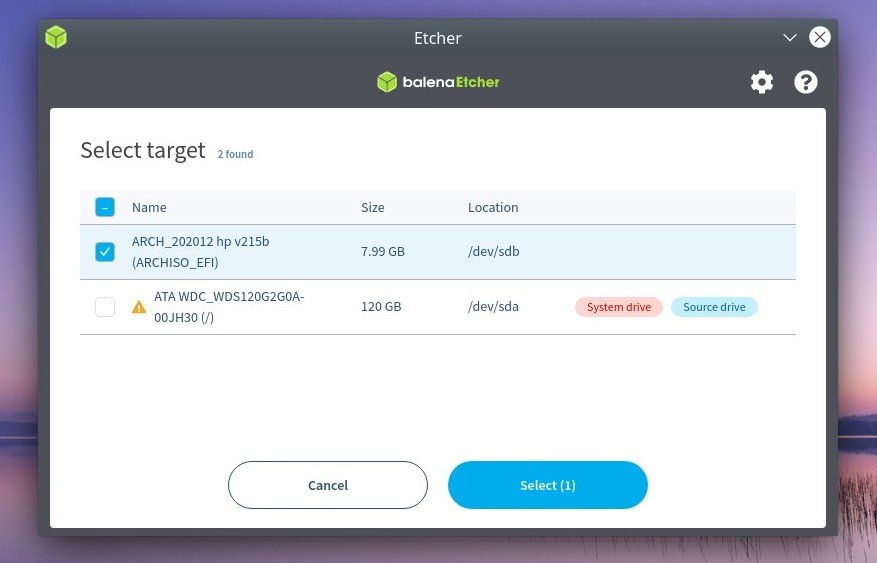
Step 2: Select the target device
Click on select target and carefully choose your USB or SD card. Etcher is friendly enough to notify you which one of the devices in your system disk so that you don’t end up destroying data.
Choose by clicking the check box. And click select.
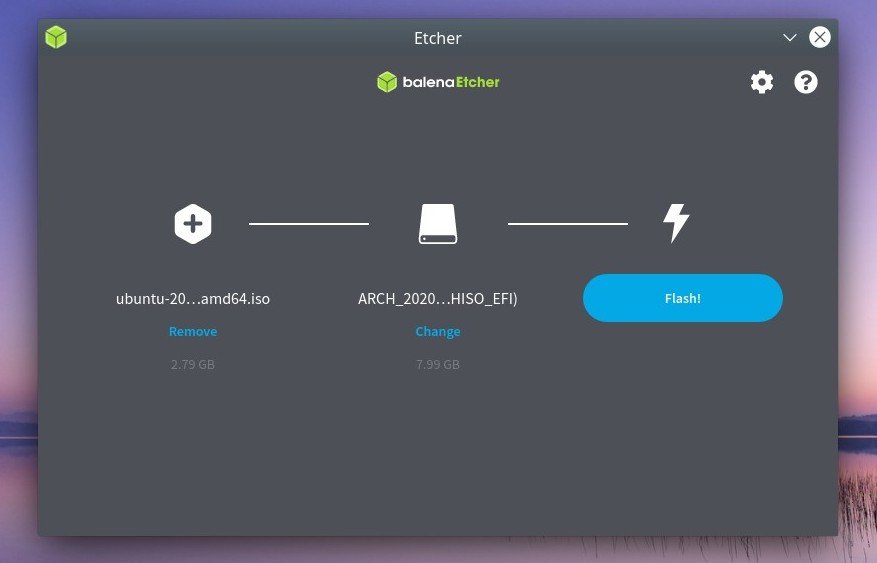
Step3: Click flash to start creating the bootable USB or SD card.
Wait until the process finishes.
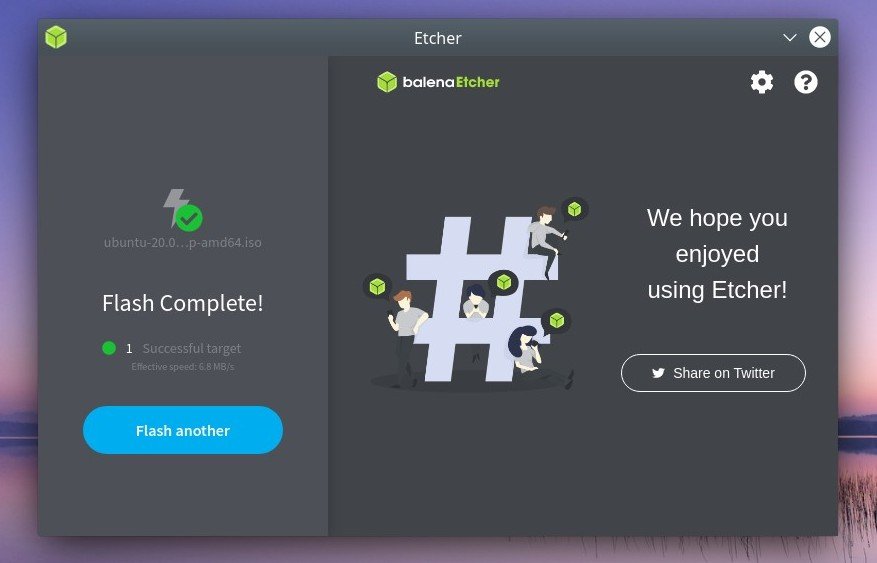
And that’s it. You can safely remove the USB or SD card for your use.
Closing Note
While there are many ways to create a bootable USB, such as you can use Unetbootin, MKUSB, or even using Ubuntu’s default Disk utility, Etcher makes it easier to do it. The UI design, only three steps process, makes it ideal for new users and source advanced users who want reliability.
Because a bootable USB is a critical asset, and you should use an excellent program to prepare it.


